Posted in Guides, Resources, Selfstudy, Uncategorized

Getting the most out of Memrise

I have been using Memrise pretty much since I started studying Korean and while I don’t use it religiously, I still consider myself a somewhat regular user.
I know that Memrise is often connected with the idea of simply memorizing, which some are for, some are against, and others just don’t really care. I have already talked about my thoughts on memorizing here so I won’t be talking about any of the pros and cons today.
However, I do want to talk about how to actually get the most of using the Memrise App or Website.
I assume that you all know about Memrise but in case you don’t, it’s a basically a flashcard App/Website with both premade and user-made sets, that uses spaced repetition to get the best results out of the time you spend on it.

  1. Create your own sets.
    Memrise comes with a ton of already made sets for different languages and topics, made by Memrise themselves, as well as access to all of the other users’ sets. Naturally, it is very tempting to simply pick a course or set and get started immediately.
    However, by making your own set you, first of all, make sure that the words you enter, are words that you actually need learn right now. That’s why you’ve come across them in your studies in the first place, right?
    Secondly, by sitting down and looking up each word on your own, and then writing them down along with their meaning, you will already get a pretty good foundation to continue building on. The words will attach to your brain in a completely different way than when you simply see a new word and its meaning.
  2. Use the Meme option to add a sample sentence.
    Memrise has a Meme option for each added word. You can add a picture, an actual meme or my favorite, add a picture with a sample sentence on it. That way you will keep the context no matter if you are learning a new word, an expression or a new grammar point.
    You can make your own sample sentence or if you want to make sure that there are no mistakes in it, then simply copy the sentence where your first came across that word or expression.
  3. Set goals for the streak.
    Memrise has a streak system, and you can set goals for each set. That way to can create a goal of how much you wish to practice every day, no matter how much or how little time you have available each day.
    The streak itself does nothing for your learning, however, it adds some accountability as well as a game-like aspect to studying. It gives you a visual overlook of your studies and I personally find that even though I don’t really think about it on a daily basis, I do find myself slightly upset by the thought of missing a day, when my streak is over 10 days.
  4. Don’t use your hints.
    Depending on whether you have a standard or a pro membership, you might have ‘Hints’ available when you are practicing your sets, and my advice is to simply ignore them completely. The thing is, that if you use your hints to guess a word, it doesn’t get marked as a wrong answer even if you use hints to guess every single part of the words. And that means that the word will show up less and less during reviewing when you actually need it to appear more often instead since you obviously didn’t remember it on your own. Also, when the words get marked (mistakenly I might add) as correct, then the words won’t be added to ‘Difficult words’. I’ll talk more about that further down!
  5. Don’t spend too long on figuring out the answer.
    Sometimes all you need is a little time to think, however, I recommend that you don’t spend too long figuring out the answer. I usually tell myself that if I was having a conversation right now and wanted to use that specific word, would I be thinking about it for this long, or would I have skipped it and reformed my sentence by now to keep the conversation going. If I would have skipped it in a conversation then it’s time to skip it during the review as well. This will automatically mark it as wrong and it’ll start appearing more often for practice so that you will be able to recall it faster in the future.
  6. Difficult words are your friend.
    Memrise has a special set called ‘Difficult words’ under each created set. While it sometimes seems like a failure to have any words in that set, it truly is your best friend. Whenever you get a word wrong or skip it, they all end up in that set where you get the chance to practice those words a bit more than the other words. If your goal is to be able to actually use all of these words without hesitation, then don’t feel bad about your difficult set. Just give them the extra love that they need.
  7. Don’t study words without context.
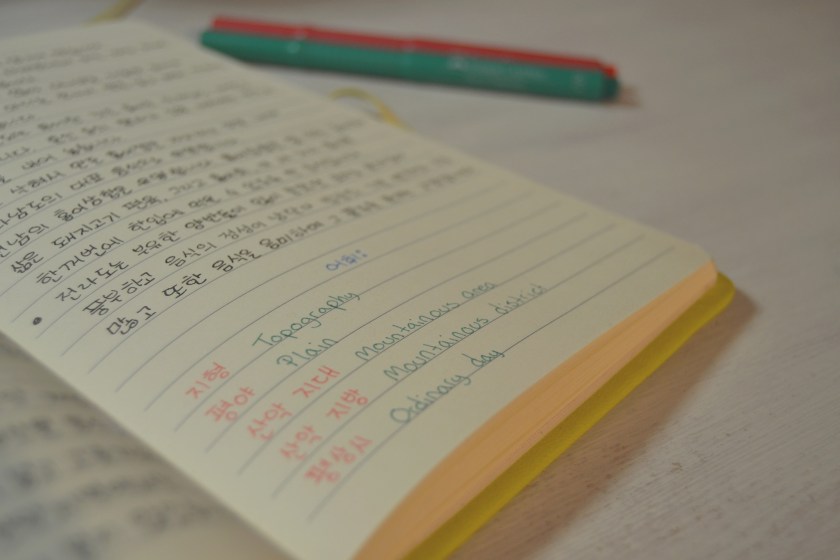
    Avoid studying words from a random list without any context. Many words have several meanings and it’s SO HARD to unlearn something again, no matter how wrong it might be. The context itself will also help you remember whatever you are learning.
    Also, I don’t see any reason to learn from such a list. I mean, I already find tons of unknown words while reading and studying, so why not just work on those words, that you have actually met in a proper context?
  8. Avoid set where words are in alphabetical order.
    If you do decide to practice sets that are premade or words that are based on a random list, at least avoid sets that are made in alphabetical order. Seriously. Just don’t. The words will be introduced in the order they have been added which means that you might get 10 words in a row that all starts with 인 and it. will. mess. with. your. brain.
    Every single word will blend together and so will the meanings of each word. It is the absolute worst thing you can do.


I hope you guys find this helpful and feel free to add your own tips for Memrise in the comments. I think we all need the help we can get, haha!

Posted in books, Guides, Resources, Selfstudy, Study With Me, Uncategorized

Study With Me: TTMIK Your First Hanja Guide

Good evening guys!
Yesterday I finished the ‘Your First Hanja Guide’ book by Talk To Me In Korean and I wanted to share with you all how I’ve been studying with the book every day, for the past few months.
Before I begin I would like to mention that I really enjoyed working with the book and I definitely recommend it if you want to try studying Korean through hanja. If you are curious about the book then I recommend that you read this review by the brilliant Sofie,  watch this video by TTMIK themselves or you can read more about it on the mykoreanstore website where you can also buy the book.
Alright, let’s begin!

As always, I begin by preparing the things I need.
I usually have the book I’m studying with, my notebook, pens, correction tape and 원고지 paper. Start

I always begin by jotting down what book I’m working with, along with the page, subject or whatever else I find interesting.

Intro

I then open up my 원고지 notes and practice writing the character. The thing is, if you are only going through these hanja characters in order to improve your Korean skills, then you don’t need to practice writing them at all. As long as you know that they exist and what they mean, then you really don’t need anything else.
However, I have known for almost two years now, that I want to learn Chinese in the future, so I’m basically using this as an opportunity to get more comfortable with the different characters and their strokes, so in my case it simply makes sense to put a little more effort into my notes. I also found it oddly calming to repeat all the strokes over and over again. It reminds me of the reasons why I bought some calligraphy books in Korea. Maybe I’ll pick them up soon and give it a try..

Practice

I then go on listen to the accompanying audio files twice. The first time I simply listen carefully to the pronunciation and intonation, and the second time I read aloud while listening. Lastly, I then read the words and sentences aloud once again, without listening to the file, while trying to sound as natural as possible.

Track

I then move on the jot down some notes about the hanja character. I write down whatever I find interesting or relevant in order for me to better remember it the next time I see it, or to help make it easier for me to tell it apart from other characters.
It can be a breakdown of the characters that help create the new character or it can be some notes on how the character got it’s meaning.

Breakdown

Once I feel like I have written down anything of interest, I move on to write down the list of Korean words that are based on that hanja character. As always, I color code my notes. In this case, hanjas are always written in red, to make easier for me to spot them in my notes. After writing down all the hanjas, I take out my green pen and write down the words in hangul next to the hanja. That way I can actually read the words that I’m working with.
Lastly, I take my blue pen and write down the definition of the words that I didn’t know already.

vocabulary

As the last part I write down the sample sentences. I do this in order to get more familiar with both the hanja word, the sentence structure and spelling of the different words. It can be really helpful to copy down some notes like these. I also avoid writing the hangul version of the words in the sample sentences. I do this because I want to encourage my brain to start remembering them without the hangul. It usually isn’t a problem since the rest of the sentence kinda gives the meaning away, and if not then I can simply find the hanja in my notes right above the sample sentences.

Example sentence

And that’s basically it! It’s pretty simple but I get to read, listen, write and speak as well,  so I found it quite helpful.
As for time, this specific character was pretty simple and didn’t take a lot of time, but some characters are a lot more tricky and has a lot more related words, so it’s going to change a lot depending on the characters your working with.

I hope you all found some inspiration to study with this (or another) book.

Posted in books, Guides, Resources, Selfstudy, Uncategorized

Ridibooks (reader) – The Korean learners best friend

I have talked about how reading in your target language can approve your language skills a few time before so I’ll try not to repeat myself today. You might find this and this helpful though!
Instead I would like to introduce you all to the Ridibooks reader app. Ridibooks is a Korean ebook website with a huge variety of books to chose from. Everything from Manwhas and self improvement books, to fiction, history books and magazines. They even have free books right here – No more excuses!
I have mentioned the site before and no I’m still not sponsored or anything. Just a genuine fan!
Lately I have been reading ebooks more often than I used to and honestly, I still prefer physical books. However, I have come to really appreciate ebooks and especially the ebook reader that ridibooks offer, which is why I’m now here to give you guys a tour of this great tool, from a language learners aspect!

When you open the app, you’ll find the books that you have downloaded on the device that you are using. There’s not much to say about this as it is pretty straightforward.
At the bottom of the screen you’ll find a little menu.

Right now we a at the first icon 내 서재 (My library).

Screenshot_20180317-122514

The next icon is 구매 목록 (Purchased books). This shows all of your books, including those that you haven’t actually downloaded on your current device. From here you can download the next book you would like to read. (or re-read)
As you can see from the pictures, I have a few books that I haven’t downloaded because I read then via my laptop, before I got my studybuddy (My tablet).

The next icon is 서점 (Bookstore). If you click here you get transferred to the ridibooks website where you can take a look around for new books. This too is pretty straightforward.

Screenshot_20180317-122627

The 4th icon is 검색 (Search). This is also pretty straightforward. You simply search for whatever book you are interested in and then it’ll redirect you to the website if they have the book you searched for. I never use this to be honest as I feel like it makes more sense to just go straight to the webshop.

Screenshot_20180317-122656

Okay, so enough of the standard boring stuff lol.
If you click on a book from you library it’ll open on the page that you where on the last time. You can also add your own bookmark by clicking on the icon in the upper right corner, but I have never experienced that the app doesn’t automatically saves the page so I haven’t used that feature in years. I guess I’ve gotten lazy.. 그냥.. 귀찮다 ㅎㅎ

Anyway, this is the page that I was on when I took the screenshots a few days ago, in a book called 말 그릇. I’ve talked about it on instagram but I think this is the first time that I’m mentioning it on the blog. You can find it here if you’re curious.

Okay this is where all the fun stuff happens!
At the bottom of the screen you can see how far along you are with the book which is always fun and next to that you have a 듣기 (listening) icon. It’s not an audio book though so I don’t really use that function, since it’s just a typical ‘robot’ reading.

Screenshot_20180317-122751

The next icon is 목차 (Table of contents). You can see how far you are along and you can also use it to skip to a certain chapter if you wish. I sometimes use it as a shortcut if I want to re-read a certain part of a book.

Screenshot_20180317-122806

The third icon is 동서노트 (reading notes).
This. Is. THE. Best. Feature!
Okay so let me explain. When reading an ebook through this reader, you can mark a word from the text and a list of new features will appear.
The first feature is 형광펜 (Highlighter), which works just like a physical highlighter. You can use this feature to highlight any word or sentence that you find useful or that you need to remember.
The next icon is the purple dot. The color of the dot indicates what color you use to highlight with and if you tap on the dot, a variety of colors will show up, allowing you to easily switch back and forth between colors. In other words you can do color coding! Use one color for new vocabulary, another for new grammar points and a third color for names and locations. It also gives you the opportunity to underline a word instead of actually highlighting it. Whatever you need!

marker optionsColorcoding

The next feature is 메모 (Memo). By clicking on memo you’ll get a little box where you can add.. well. A memo.. To the word that you have marked. It could be the definition or maybe a sample sentence using the highlighted word. It so cool! And yes this genuinely makes my little geeky heart excited.

Saving a memo

If you chose to add a memo, then you get a little symbol by the word to remind you that you added something to it.

The next icon is 듣기 and it works just like the 듣기 at the bottom of the screen, except it only reads the part that you have marked.
If you tap at the 3 dots next to 듣기, then you’ll get two more options called 검색 (Search) and 공유 (Share).

other options
Search is probably my favorite feature. It you tap the search button then the app will connect you to Naver Dictionary. This means that you can look up words straight from the book without ever leaving the app. Once you’ve gotten the information that you needed, you simply tap the arrow in the upper left corner and you be back on the page you where reading.
It’s just so freaking convenient!

dictionary

As for the share option, it’s not at all a necessity but I really really love it! If you tap the share button, then you get two alternative ways of sharing it.
The first one is 이미지로 멋지게 공유 (Share as a cool picture) and 텍스테로 공유 (Share as text). I love the picture option. If you come across something inspiring or noteworthy then you can immediately create a beautiful quote picture, which can then be uploaded from the app, straight to you social media accounts.
Again, not at all a necessity, but still really cool!

shareing

Screenshot_20180317-124222

Okay, so that was all of the options that appear when you mark a word. Now let’s get back to the 동서노트 (reading notes) icon at the bottom of the screen. It you tap the reading notes icon, then you get a list of all the additions you made to the page. In my case, you can see that I highlighted new vocabulary with the purple marker, and now every single word that I have highlighted has been added to this long vocabulary list. If you do color coding then you can also make it show the words or sentences that are highlighted with a specific color. You can also access the memos that you make from this page.
I use the feature really often to create online flashcards via memrise or quizlet. I simply copy and paste the words.
You can also use it to track your progress. Try accessing a list from a book you read a year ago, and see how many of the words you know now. It’s a lot of fun!
If you wish to delete a note from the list, you simply tap the three dots next to the note and choose 삭제. Super simple!

Screenshot_20180317-124439

It’s also possible to change the font size, colors and so on, you simply tap the 보기 설정 icon. You can adjust pretty much everything you want to.

Screenshot_20180317-124300

As I mentioned in the beginning of this post, I still prefer hard copies and writing my notes in hand, but you literally have any tool you might need for language learning, through this reader. I use it on a daily basis because it’s just too convenient not to, especially on days where I’m out and about or traveling. I totally recommend giving it a try if you are learning Korean!

Posted in Guides, Resources, Selfstudy, Study With Me, Uncategorized

Study With Me: Kmooc – 한국인의 똑똑한 밥상

Lately I have been getting quite a few questions on how to study rather than what materials to study with which has made me realize that self-studying isn’t an easy task to everybody. For some reason it has always seemed quite natural to me and I never struggle to find materials or new methods to learn. I adjust everything to my needs and I can spend hours on relatively simple materials because I want to get the very most out of it.
Since I always struggle to explain HOW to study, I figured I’d start a series on the blog where I simply just show you guys what I’m working with and how. Hopefully you can feel inspired and try out a few of the things that I do, and as soon as you have an idea of what you like to do and what works the best for you, you can simply start to pick and choose from your experiences. The best way to study is honestly impossible to write down. It’s such an individual thing and you just have to try a lot of different approaches to see what works for you and what doesn’t.

Today I want to show you guys how I’m going through a Kmooc course called 한국인의 똑똑한 밥상.

asset-v1_CBNUk+CBNU05k+2017_L5+type@asset+block@전북대학교_K-Food_한국인의_똑똑한_밥상_이미지

This is a course in Korean, for Korean people so obviously that influences my study approach. There’s not any explanations to vocabulary or grammar that I need to write down since it isn’t created for foreigners. Instead I take a lot of notes on the actual content and the unknown vocabulary.

I begin by collecting all of my materials. I’m currently obsessed with my Ecco Pigment pens and I use a Tombow correction tape. It’s the best correction tape I have tried so far (and I have tried A LOT), and I totally recommend it.
My yellow Aurora notebook is only used for my Kmooc course notes.

Study items

I then get my studybudy ready a.k.a my tablet. When I know that I’ll be studying for a long time, I always use the Pomodoro technique. I might write about it in an blog post soon, but you can just google it if you’re curious. Basically you just have a timer to tell you when and for how long you should take breaks to get the most out of your studying efforts. I also use my tablet to look up vocabulary. As soon as my studybudy is ready to go, I put my phone away in my drawer and I don’t touch it again until I’m on break or done with studying.

Timer

I begin by watching the video lesson. The lesson is in Korean and has the option of Korean or English subtitles. I watch it with Korean subtitles because that way I have a clear image of how much I understood from the video. I listen carefully and read along as the professor starts the lesson.

Korean version

I then re-watch the lesson with English subtitles. I do this to close any gaps in my understanding as well as to confirm the things I believe I understood from the lesson. It’s a good way to find out just how much you might have missed or maybe even misunderstood.

English version

Now that I have closed any possible gaps, I’m moving on to taking notes. I switch back to Korean subtitles and look at the transcript. At this point I understand more than enough to choose whats important and what is not from the transcript, but if you are struggling then you can keep the English transcript and either write you notes in English or simply mark the time stamp and then find the same paragraph in the Korean transcript. I recommend the latter. Even if you struggle to understand the notes you are jotting down it’ll still make you feel more comfortable with the words, the grammar and the sentence structure. A third option could be to write down each of the points you find important, in both Korean and English. Just do whatever works for you!
My notes a mostly just copied straight from the transcript, however I do change certain parts. I find that this course repeats the same points quite a few times and I see no use for that in my notes. Also I change things like ‘우리나라의’ to ‘한국의’, because it would just be too odd for me to refer to Korea as ‘우리나라’ as a foreigner.
Basically it’s all just about adjusting everything to your needs and preferences.

It took me just over 6 pomodoro sessions to finish my notes, so around 2 hours and 30 minutes.

Note overview

Now I move on to vocabulary. As for me, I find it way better to learn vocabulary through context so I always look up words in the end. By this point I have already learned a handful of words through context and I find that these words stick to my brain way easier than all the other words.
I now go through the transcript once again, writing down all the words I still don’t know or are unsure of. Even if I know that I wrote down a certain word from the last lesson as well, I still write it down. Repetition is your friend in this case, and someday it’ll suddenly stick!
I always color code my notes. It makes everything way more organized and it’s such a big help when you want to review your notes.

I spent another two sessions (50 minutes) on looking up words and writing them down.
Vocabulary notes bestVocabulary notes

Lastly, I create a Quizlet set. This is in itself a great way to review everything, because you have to write down all the words once again. When I’m done I can usually already remember a few of the words, which makes me feel great when I actually start practicing via the app.
Quizlet also remembers definitions so if you (or someone else) have written a certain word then it’ll often suggest previous definitions to that word, which can save you a lot of time.

It took me around 25 minutes to create my set.

Quizlet

In the end I spent just over 4 hours studying a lesson, based on a 9 minute video + whatever time I end up using on Quizlet later. I could have just watched it once with English subtitles and then moved on, but why not take advantage of the video and the transcript, and get as much out of it as possible? At least that’s how I feel. If you struggle to stay focused or if you hate working on the same thing for a long time, then obviously this might not be the best approach for you.
It’s all about adjusting!

I hope this was somewhat helpful!

Posted in Dealing with stress, Guides, Personal, Uncategorized

Dealing with stress: Life Planner

As most of you already know, I’m under a lot of stress lately, and having been very sick due to immense stress a few years ago, I’m very cautious about how I handle things this time around. I have a lot of things that I HAVE to do as well as a lot of things that I WANT to do, but no matter how important all of these things are, letting myself and my body down, is not a choice.

“Sometimes the most important person
in your life needs to be you”

I know that I’m not the only person who struggles due to stress and I know that we are all very different and have very different ways of coping, so this might be a completely useless blog post, but if this can help just one person then I’ll be more than pleased.
And that’s why I would like to introduce you all to Alfred!
Alfred is my Life Planner – Yes I have a tendency to name all of my favorite items. I named my Dolce Gusto Piccolo ‘Bent’. Or rather ‘Bent the penguin’.. I also gave him googly eyes but that is a completely different story!

Basically I’m a planner. I need everything written down. I need to-do lists, goal list, shopping lists, meal plans and so on. The more lists the better. And I need to keep it all together in one convenient space. I do not work well with lists or calendars online or on electronic devices. I don’t know why but it just doesn’t do it for me. I’m also incredibly picky when it comes to calendars. In Denmark, most calendars are way too small. There are practically no extra spaces to plan out the things that I need to plan. They also all have an hourly set up, going from around 8am to 5pm. How is that going to help me when I have an Italki session at 7am, taekwondo at 7pm and a movie date at 9pm? And what about all those empty time slots where I have no plans? That’s a waste of space. Sure I could just write my other plans in those slots and correct the time, but doesn’t that just prove my point that the time slots where useless (In my case at least) to begin with? This might seem like I’m overly picky but it’s super important to me.
This is where Alfred comes in. Alfred is a custom made Life Planner and I literally chose everything about him myself. I chose the cover, page layout, cover, planning pages, added quotes and even chose the color of the spiral. There’s a few companies out there who offers these services (and this is not sponsored by the way) so if you are just as picky as I am, then you will definitely be able to find something that suits your taste.

The most important about Alfred is that he is a LIFE planner and not just a planner. This means that it’s about your entire life and not just your working hours like most standard planners. I ordered Alfred from Pirongs, and I added all the things that I needed. Blogger planning pages, Christmas (as you might remember from last year, Christmas is really important to me) planning pages, cleaning pages (I’m a neat organized freak in my study space but everything else is pure chaos), fitness goals, study pages and a lot more. There are a ton of other pages you can add like budget pages, wedding planner pages, teaching planners, notes and whatever else your heart might desire.
You can also add text and pictures to all of your pages.

Alfred is very personal to me so I can’t show you everything, but I’ll show you a few of the empty or less personal pages.
I have been wanting to buy a custom made life planner for a long time and obviously it does take some time to produce it, but I believe it’s worth it. I received Alfred in the mail 3 days ago and I’m carefully adding all of the craziness that is currently going on in my mind. All the dates, all the demands, all the wishes. I feel lighter for every line I write. I also just ordered some stickers and washi tape, so I can decorate my pages even more with a few fall themed goodies.
Having all of my s**t put together in one book is in itself a stress reliever but writing and decorating it adds a whole new relaxing aspect. I recommend that you try it. If you enjoy color books then you might like decorating too.
Another alternative could be a bullet journal, but I feel like it’s a bit too time consuming for my schedule. I’d love to try it some day, but for now Alfred is my savior.

Again, I’m not sure if this will be helpful to anybody other than me, but there’s no harm in trying – right?

Posted in books, Guides, Resources, Selfstudy, Uncategorized

Reading books in foreign languages

When it comes to learning a language there are tons of ways to improve your skills. My best tip is definitely to read a lot in your target language since it can improve your skills in so many different ways, but I’ll save that for another blog post and stick to the actual topic of this post for now! While I recommend reading about a variety of subjects in a variety of forms, I personally find reading books to be the most helpful and interesting.
However, jumping into reading books in a foreign language isn’t always that easy. Unless you already have some fairly decent skills or a ton of patience (or stubbornness perhaps?), then you will most likely struggle a lot when you first try it out.
I know so many people who have gotten discouraged and filled with frustrations while trying to read books, that they no longer want to even try.
As a book lover I really find it sad whenever people around me fail to find joy in their books, and especially when the struggles are caused by the language and not the book itself.
I read my first book in Korean a little over a year ago and I’m currently working my way through my 7th book, so I thought I would give you guys a few tips on book reading in foreign languages!

  1. Choose a book that isn’t completely new to you. It can be a book that you have already read, a fairy tale you remember from your childhood or maybe a book version of your favorite movie. This way you will find it a lot easier to fill in the missing gaps – because you will have random gaps here and there. I also don’t recommend reading books that you already know by heart. If you do that then you risk getting bored too fast and you might stop paying attention to the actual book while reading it.
    It’s all about balance.
  2. Choose a book with novels or short stories, or a long book with short chapters. Short chapters gives you the feeling of getting somewhere. If you read 3 pages from a 10 paged chapter then you will feel the progress asap, but if you on the other hand read 3 pages from a 50 paged chapter, then you will feel like you have gotten just about nowhere. You effort remains the same but those 3 pages will feel a lot more valuable in short stories or chapters.
  3. Look up every unknown word in the first chapter. The first chapter is usually some sort of introduction to the characters and the overall story, which means that all the most important words for that specific book will show up over and over again in the first chapter. If you keep looking them up until you remember them, then you will find it a lot easier to work through the rest of the book. Of course you can look up all the unknown words throughout the entire book,but my personal experiences tells me that this method usually becomes too overwhelming. Personally I prefer looking up all the unknown words during the first chapter, and after that I only look up words if I suddenly find myself feeling lost after reading a full page or of I see a certain word being used again and again.
  4. Make an actual effort. Don’t keep the book in your bag and only bring it out when you have to wait for someone or when you smartphone battery dies. Make an actual effort to read the book. Decide on an adjustable goal every day and make sure to bring out that book in order to accomplish it- even when you aren’t bored to death!
  5. Try reading books in both digital and paper format. I have always preferred paper books as I enjoy the feeling of putting in a bookmark and then being able to see how much I have read as well as the feeling of actually turning the pages. Also I used to get really tired from reading digital books and bad headaches were pretty normal too. These days it seems to be getting better, but I definitely still enjoy paper books over digital books. It might make a big difference to you too.
  6. Try out pretty books. This might sound really stupid, but I personally enjoy books with pretty pictures. Especially drawn or painted pictures. It feels sort of like a check point whenever I get to one of the pictures, and I feel almost just as excited to reach those as I do when I reach a new chapter. I collect the Indigo books and I definitely recommend them if you want to enjoy pretty pictures while reading great stories

I’m currently reading 빨강머리 앤.

rod2

rod3rod1

I hope you found this post useful!

Posted in books, Guides, Resources, Selfstudy, Uncategorized

REVIEW – Korean Q&A sentence patterns by TTMIK

qna-1

This is a book that just recently joined my growing collection of books, and since it is one of my current favorites I decided that it was more than worthy of a review on the blog.
The funny thing about this is that I actually bought the e-book when it was published, but because I prefer physical copies I never quite got around to using it. I usually force myself to read e-books since not all books will come out in paper format, but it does take me a lot longer to work through them, which is why I currently have 2 other e-books on standby.. I will get to them soon, I promise!
Anyway let’s get to the review!
As usual I will go through the setup, good points and bad points, my general opinion and lastly my advice for studying with this specific book.

Setup
The books starts out with a short but thorough introduction to the content as well as TTMIK’s own advice on how to study with the book. This is followed by the table of contents and then we get to all the fun stuff.
qna-2

qna-3

The book contains 10 categories, which each has 5 main questions. All of the main questions are followed by 3 similar questions, a main grammar point, a sample answer as well as 3 similar answers.
The book provides vocabulary lists, study notes, a real life answer from a TTMIK teacher as well as a sample dialog.
Lastly there’s a blank area for you to write your own answers in.
The book comes with downloadable audio files.

qna-4

qna-5

qna-6

qna-8

Good/Bad points
The good – in no specific order:
– Visually pleasing.
– Realistic and interesting topics.
– Easy to review due to study notes.
– No romanization.
– Can help you improve listening, speaking, reading as well as writing.
– Can help you gain confidence by giving you knowledge about basic patterns as well as expected questions/answers in certain situations.
– Clean design that allows you to focus on the actual content.
– Perfect travel size.
– Answers from real people.

The bad – in no specific order:
– I always write answers on a separate paper and never in my books, but if I did then I would like a bit more answer space.

My general opinion
As mentioned in the beginning of my post, this is one of my current favorite books to study with, and I keep finding more and more ways to study with it, so personally I would recommend this to anyone who is beginner or intermediate. It’s a great way to improve your conversational skills and take a step towards talking Korean more freely, which is what I am currently working a lot on.

My advice on studying with this book
– Go through all the main questions. If you can answer them with confidence then you can move on to the next one. Sometimes you might learn something unexpected and even if you don’t, the book is made in a simple way that allows you to read it all quickly without feeling like you’re wasting your time. Not to mention that confirming your skills might give you a boost of confidence!
If you cannot answer with confidence then work through the assignments provided.
– Make sure to write your own answers to the questions. You can easily skip it or copy one of the sample answers, but practicing is really important if you want to really learn how to use these patterns. Also, writing your own answers forces you to really think about the question and the patterns and in many cases you will also have to look up words that are relevant to your specific answer, which will bring you even more knowledge about the topic.
If you find it very difficult, then start by writing your answer on a separate paper in your mother tongue. This will remove any barriers in your thinking while answering as well as it will give you a guide to what words and grammar you need to look up before answering in Korean.
– Avoid practicing wrong things. Make sure to get your answers checked so that you can learn from possible mistakes instead of teaching yourself something incorrect. You can ask friends, language partners, teachers or get help from websites like italki, lang-8 or apps like Hellotalk and HiNative (Reviews are coming for all of these).
– Use the audio files to practice both listening and speaking. These short files are perfect to imitate and practice pronunciation and intonation.
– Study with a language partner or friend if possible. I’m going to use the topics for my future italki sessions, and I’ll use the book to help me prepare for each session/topic.

I hope you guys found this helpful!
Let me just end today’s post by telling you guys that TTMIK is currently having a chuseok sale so now is a really great time to invest in this book! You can buy it HERE

Posted in Guides, Resources, Selfstudy, Uncategorized

Today’s expression – With Naver

I have been wanting to introduce this convenient source for a while, but due to being sick, taking a week long course related to my internship and then having my internet fail me, I simply haven’t been able to do much about it until now.
Nevertheless I am fully back on track, with 17 (yes I’m serious) drafts on my blog, ready to be tackled! I have so many things to share with you guys, and I haven’t even been gone for 20 days! Oh well!

‘Today’s expression’ is a little gem that you can find on the Naver Dictionary app (I haven’t seen it on their website but I can imagine that it is available there as well) and even though it is meant as a tool to learn English, it works pretty well for learning Korean as well! I have seen similar tools online before but because they had some questionable English translations, I wasn’t too thrilled by the thought of using them, even though English isn’t my target language.
I have been going through ‘Today’s expression’ almost every day for a while know and I am happy to report that Naver, in my opinion, is translating these sentences naturally rather than literally (which in certain cases wouldn’t have made sense at all). Good job Naver!
Okay, so let me just walk you guys through this little gem even though you probably don’t need me to. What can I say, I missed talking to you guys!

To begin with, Naver gives you an English sentence/expression along with a Korean translation of it. After that you have an English sample dialog to make sure that you have a context to put the expression into (something that I appreciate in any language).
Then the app breaks down the most important parts of the expression and gives you 3 sample sentences for each point, to show you how to use the same pattern in other sentences. This part comes with a Korean equivalent as well, which is why it can be helpful to Korean learners as well.
Lastly, the app provides a short vocabulary list from the sample sentences.
Basically it’s like learning a language backwards, and it is working fine for me!

Here’s a few examples from the app!


If you want to do some cramming or hardcore studying then this is obviously not for you, however it is a small and light lesson that you can add to your daily routine, in whatever way you wish.

I hope you guys found it somewhat helpful or at least interesting!
I’ll see you guys soon!

Posted in books, Food, Guides, korea, Personal, Selfstudy, travel, Uncategorized

Planning, Studying, Dreaming

Planning, Studying, Dreaming – That’s exactly what I’m up to today!

Last Friday I received a few amazing presents on my email, from (one of) my language partner and good friend. He had sent me 3 different guide books full of gems and the best of it all is that it is all in Korean! To begin with I was just exited because I really love guide books – and blogs, articles, videos etc – as they allow me to plan things for my own trip to Korea and I can also use them to dream myself closer to my travel dates! But then as I was printing them out and skimming some of the pages and looking at the pictures, it really hit me that these books are pure goldmines! First of all, there’s so many new words that I can learn and use for my own trip, especially if I want to visit those specific places or if I want to take a guided trip while I’m there! No matter what, we can always use more vocabulary – right? Secondly,  I quickly noticed that many of these books are filled with history and culture and if you are like me who has a general interest in Korea and not just in the language, then that is indeed an amazing thing! Study your target language and learn about your interests at the same time – If that isn’t a perfect combination then I don’t know what is!
In my case, my friend bought me a book for 부산, 경주 and 제주. I’m not planning on visiting these places on our trip but my sister and I are determined to visit them some day so I’m really excited to learn more about these places!

jeju1


jeju2


jeju3


These books have facts, pictures, addresses, recommended places, recommended food, recommended accommodation, maps and guides on how to get to the different places. I really can’t explain how excited these books make me. These are from 투어팁스 and can be bought for practically no money, several places online. I personally love to buy ebooks through Ridibooks.com and if you want to check them out then you can find them right HERE – They also a travel books for other places than Korea so I you are interested in other countries and still want to practice your Korean, then here’s your chance! Personally I’ll be buying the one about 서울 as soon as I have finished this post! UPDATE: Not all guidebooks are compatible with pc and mac, so remember to check that out if you don’t have other reading devices!

If you don’t want to spend money then you can also just try to search for ‘(place)가이드북’ and you should be able to find some for free here and there. I know that VISITSEOUL.NET have a bunch of guides with different purposes, and they seem quite interesting too! You can find them HERE

Now I’ll be returning to my books! Have a great Sunday everybody!